
Need to Find Ways to Correct My Squat Form
I have been working on adjusting my squat form lately. Ever since I got out of the boot from my ankle injury my squat form needs to be corrected. It is awful guys! My foot turns out, my weight shifts and my arms fall forward its like textbook muscle imbalances. I know from my recent NASM Corrective Exercise Certification what I need to do. The other day I was thinking, my corrections could help others too but first let’s talk about what happened.
What Happened to My Ankle?
Early in December, my first day of what was supposed to be my second Figure Competitor prep. I was training a Small Group at the gym I work at, and I was starting the warm-up. It was less than five minutes into the session when I did a hop off the ground maybe 3 inches (really it was a bunny hop) and came down and felt my ankle shift right and then left. It made the most awful sound like two gunshots.

Instantly, my entire gym stopped because like I said it sound like gunshots. I knew it wasn’t right but I was hoping it wasn’t “that bad”. Immediately, I lifted my foot up and started praying until I didn’t feel like I was going to pass out. One of our members was like, “Oh good! Color just came back to your face.” It was unreal.
First Real Injury
I’ve never experienced a real serious injury. I had a hairline fracture in cheerleading in high school that required a six weeks cast being young, so I was in and out of the cast with little rehab afterward. Young bones heal quick. This injury I didn’t break a bone, well kind of, I tore two ligaments my anterior talofibular ligament (ATFL), which connects the front of the talus bone to the fibula, or shin bone. The calcaneofibular ligament (CFL), which connects the calcaneus, or heel bone, to the fibula. I also chipped and bruised my fibula because the impact when my bones hit each other when I came down and my ligaments popped.

The pain that I still feel at the end of the day is from the chipped bone and bruise that is still tender under pressure. Bone bruises take months to heal. In the meantime, I need to keep my ankle in motion and continually work on correctives. Also, because of Worker’s Compensation limbo. I was in a boot for 5 weeks too long which caused other issues of muscle tightness and compensations.
Finding the Good in Everything-Even an Injury
The result is a really ugly and unsafe squat form. Making sure that I perform a correct squat will prevent me from other injuries in the future. Recovering from my lethal bunny hop has been mentally and physically hard. It wasn’t the start of my new year that I wanted. Silver lining reflections, it has taught me a lot about appreciating my body for being healthy and functional. It is awful not to be able to do what you want with your body and can be very frustrating even for those who have lived most of their life impaired.
Thankful for the Progress I Have Made
I am so grateful that I can walk unassisted and even jump now. My newest challenge has been consistently working on correcting my squat form. Due to the last 7 months of overcompensations, I have to train my body again to have proper movement patterns. I thought I would have recovered quicker but I was in my boot for 5 weeks too long while seeking second opinions with doctors.
I was trying to avoid having surgery and wanted to take a conservative approach which included lots of physical therapy. In between waiting for things like workers compensation approval, appointment availability. My ankle was immobile 5 weeks longer than it should have been. Ankles are meant to move and when they are in a static position for a long time they will lock up which is what I am working on now.

My left leg has extremely tight calves that won’t release my posterior talofibular ligament (PTFL), which connects the rear of the talus bone to the fibula. Laymens turns my calves are tight and won’t let my foot flex and point properly. My hamstrings also take on a lot of work because that’s what your body does it adapts. My right hip flexor and piriformis are overactive because it’s been taking on most the work for the last 4-7 months from me not using my left leg correctly. Without fitness geeking you out any further pretty much my kinetic chain is offline and I am pretty jacked up and so is my squat.
The Benefits of Squats
7 Things to Correct My Squat and Eventually Progress It:
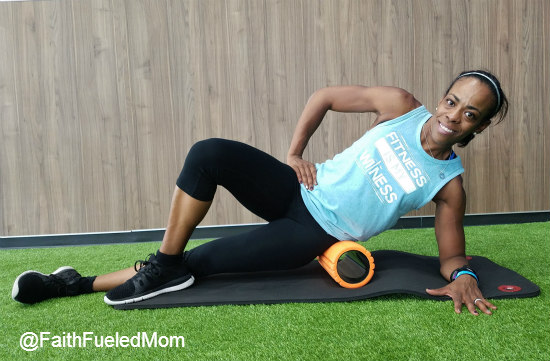
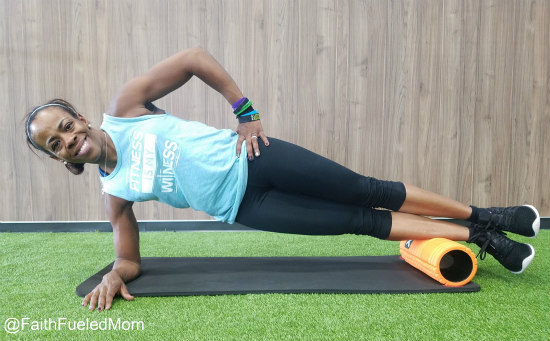
1. Rollout
Grab a foam roller and get to rolling and I am not talking. A casual few rolls back and forth and good to go. Slowly. Apply pressure to your back of calves (gastrocnemius) shift your leg side to side and then roll it out again, outside “calves” (peroneal) do the same thing. Get your (biceps femoris) and your TFL or Tensor Fascia Latae that muscle gets a lot of action because it works in all planes of motions and pretty much you move it moves so make sure that you roll those out too.
Grab a Good Foam Roller
I really love the Trigger Point Grid Foam Roller. It is really firm so it seems like fingertips as well as the tubular ridges on teh foam roller. The flat side is like the palm of your hand when you really need to release tension from a muscle. It’s nice to hold it on the flat side for 20 – 30 seconds and allow the muscle to release. It’s great because of the pattern on the actual Grid foam roller channels blood and oxygen to the muscles which helps to repair and increase circulation. A fantastic tool to use for recovery.
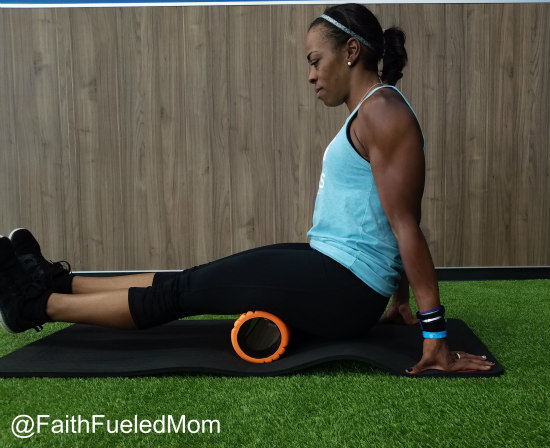
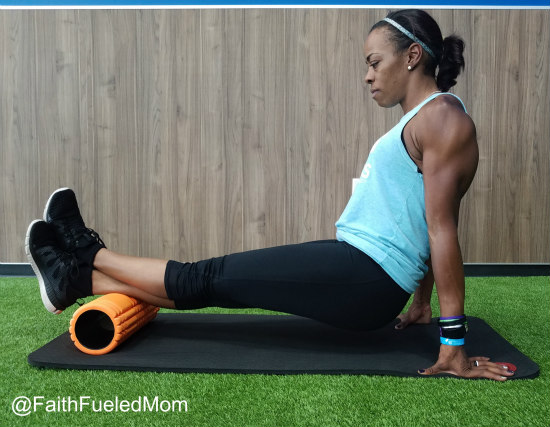
Remember, I said I have extremely tight calves. Most people do. We need to really work on loosening these easily, increasing circulation and blood flow and releasing tension from these small but mighty overactive muscles. Just imagine how much work they get in there day to day activities. Calves are usually the culprit is something I have learned in training and through this injury.
2. Stretch
I know I always talk about stretching but it really is important and if you want to have a correct your squat form.
A lot of people don’t stretch and when they do it’s only for a breath moment. Most people stretch first and then foam roll second. I would recommend to do these two preparation/recovery techniques in reverse- Foam Roll and then stretch.
My professor in college used this analogy that I tell anyone who is listening (or reading) thanks, Professor Amber Boyd. “When you get a knot out of your shoelace. Do you pull the laces tighter or massage the knot out first and then pull on the laces?” I know AH-HA moment.
Always foam roll then stretch. So whatever you foam rolled once you’re done go ahead and stretch those muscles out that you rolled. It also may not be the best idea to strength train them until another day but if you then make sure you foam roll and stretch at the end of your training.
Here Are Some Suggestions on Easy Ones You Can Do for Each of Those Muscles:
Stretching Calves
Calves or Gastrocnemius Stretch from FaithFueledMom on Vimeo.
Stretching Bicep Femoris
Bicep Femoris Stretch aka Hamstring Stretch from FaithFueledMom on Vimeo.
3. Dynamic Stretching
Most people associate stretching with static poses that are held for brief moments of time. I personally enjoy dynamic stretching and include it in my clients warm-up routine. Activating the muscle that is under-active and preparing them to fire up while using movements that make them for the workout. These are the muscles that should be used but aren’t because the tight muscles or over-active muscles are doing all the work and not letting them do their job correctly.
In my case since I have an ankle injury, it’s my Posterior tibialis, Anterior tibialis and Medial Hamstring; I suggest about four reps starting off slow and then increasing the movement as you feel your body release tension.
Kneeling Chops
Kneeling Chop from FaithFueledMom on Vimeo.
Leg Raises
Leg Raises from FaithFueledMom on Vimeo.
Bridge Kicks
Bridge Kicks from FaithFueledMom on Vimeo.
4. Start From The Beginning
I started off Dowel Hip Hinge to make sure that I am aligned and keeping all points of my kinetic chain in line while Squatting. Also, using physical cues by squatting on a bench with a reach to help with balance. It helps me make sure that my feet are correctly placed (shoulder width apart, with my big toe, lined up with my shin; and yes you feel knock-kneed you are doing it right). Hinging my hips properly and correcting forward lean as you see is still something that I am altering my squat form.
Dowel Hinge
Dowel Hip Hinge from FaithFueledMom on Vimeo.
Squat to a Box with a Reach
Squat to Box reach from FaithFueledMom on Vimeo.
5. Work on Counterbalance
I have an asymmetrical weight shift as you see in my picture. I also have limited Dorsiflexion which if you look at my left ankle you’ll see it’s not as flexed as the right side. These are the things that I look at in my clients and when I watch people working out at the gym. Little compensations in your movements allow to get the job done, but it’s not always getting the job done well. Using offset weights is functional.
You usually carry your laundry, purse, groceries, and kids on the same hip (unless you have twins or lots of groceries). That is your dominant side and probably stronger than the side you use less often. It’s okay to pick up two different weights and balance yourself. Also, in my case with weight shift, I like to do offset squats holding the kettlebell on my left weaker side to strengthen it and activate it during movement. My right side will take over if I let it. Here are two squats you can use counterbalance to fix compensations.

Offset Kettlebell Squat
Off Set Squat from FaithFueledMom on Vimeo.
Double Kettlebell Front Squat
Double Kettlebell Squat from FaithFueledMom on Vimeo.
6. Work on Front Loads
Working on front-loaded squats can be helpful to solve problematic squat form. When you have the load on the front, it helps you to consciously feel the right movement. The weight loaded in the front forces you to sit up straight and hinge back correctly.
Goblet squat (kettlebell or dumbbell)
Goblet Squat from FaithFueledMom on Vimeo.
7. Progress to a Correct Squat
Barbell Back Squat
Working on each of this exercise is to build up your strength and form. Doing these several regressions are preparing you to execute the Barbell Back Squat. Back squats are a great strength exercise that works most of the muscles in your lower body mainly, your quads, hamstrings, and glutes.
Barbell squat is an exercise that permits you to lift heavy loads throughout your entire body. It helps strengthen your core as well as legs because you need to brace the load and protect your back when squatting. It is essential to progress to this exercise and not begin with this exercise. Often poor squat form is the cause to back injuries, knee and neck injuries.
Barbell Overhead Squat
When your correctly and consistently Barbell Back Squat I would then progress to an overhead squat. Pressing the Barbell over your head as you squat.
It is critical when trying to correct your squat form that you follow the order and don’t skip around. Each stage builds on the next. I would spend a lot of time starting from the beginning. Mastering those skills and then moving on to the future ability. Proper patterning is vital so that when you progress to the more challenging squats, it comes with greater ease.
Also, don’t be afraid to progress. Don’t get stuck on skill because you’re scared of the challenge. Development is how change is made so don’t be scared to move on to the next skills once you feel really proficient. Correcting your Squat not only protect you from injury now it will help you function better in your future.
Is there a skill that you wish you were better at and want to correct?


