Every single one of my in-person clients gets a complimentary session. Most of these sessions go about the same way. I need to know how strong you are, so we do bicep curls. I need to know how your form looks when you do squats and lunges. And I need to know how much endurance you have so of course, we do the dreaded PLANKS!
When I ask my clients for pushups for the first time, I ask them to show me their best 5 pushups. Just to see what they’ve got. I then make a few adjustments, if needed, and ask for 5 more. I DO NOT DO THIS WITH PLANKS. Nearly everyone has been taught to do planks in the most unsafe, inefficient, ineffective way ever.
I show my new client the plank that they’ve been taught, and then I demonstrate for them the plank that I want. Instead of asking for 1 minute, I ask for 20 seconds. A more efficient exercise means we can spend less time doing it.
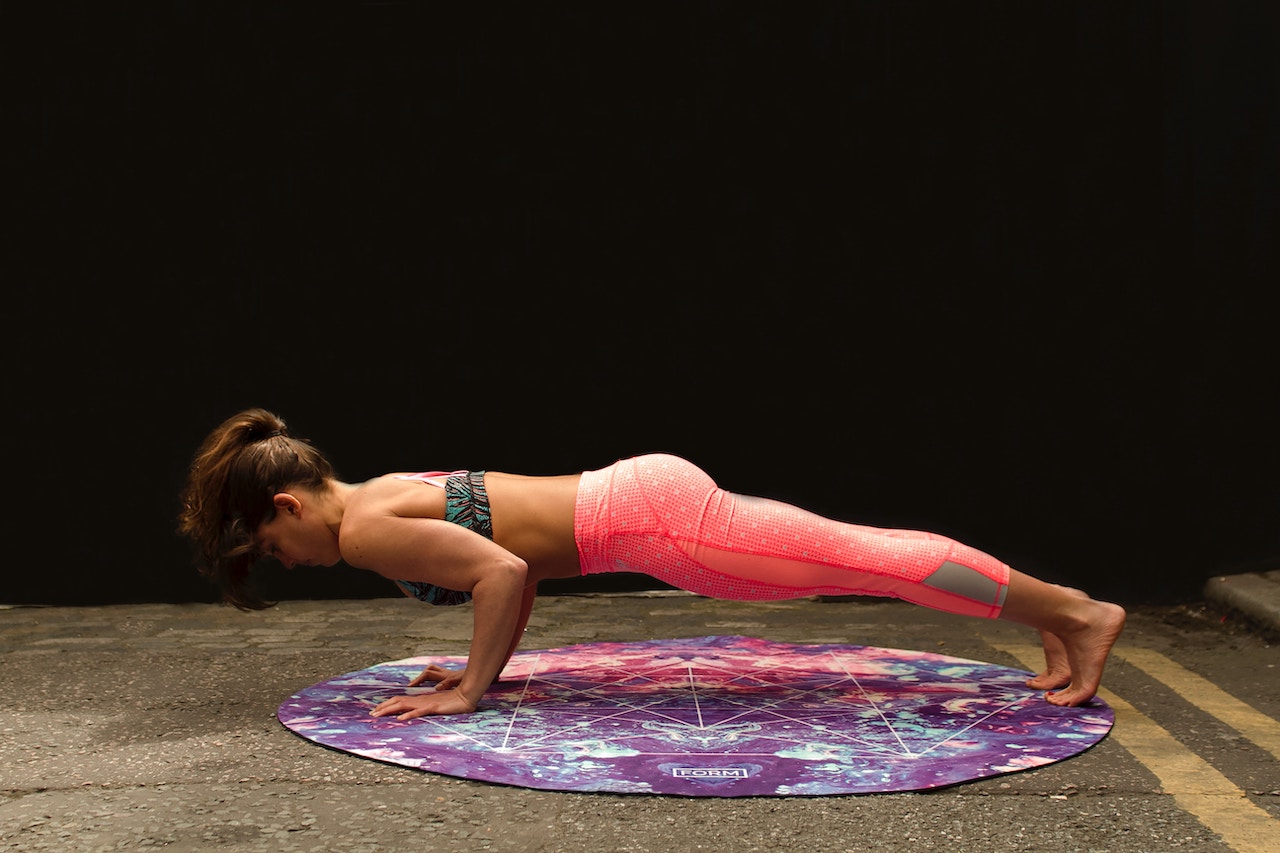
THE TRADITIONAL PLANK:
Almost everyone learned how to do a plank either in gym class or team sports or doing home workout videos. Somewhere along the way, someone was lying to you and telling you that the ideal plank should be the following:
- One long line from your heels to the top of your head.
- Hands on the ground like the top of a pushup position.
- Knees straight and lifted off the ground.
- Belly button tight.
What they don’t mention is that after about 15 seconds, the abs begin to get tired and guess which muscle group takes the brunt of the work when the abs give up? That’s right! The low back. And as a personal trainer, I always see the tell-tale arching of the back that means you are no longer working your abs. You are working your low back, and straining your low back, and about to injure yourself. Also, why on earth are you putting that much strain on your wrists? There are zero reasons for any of this.
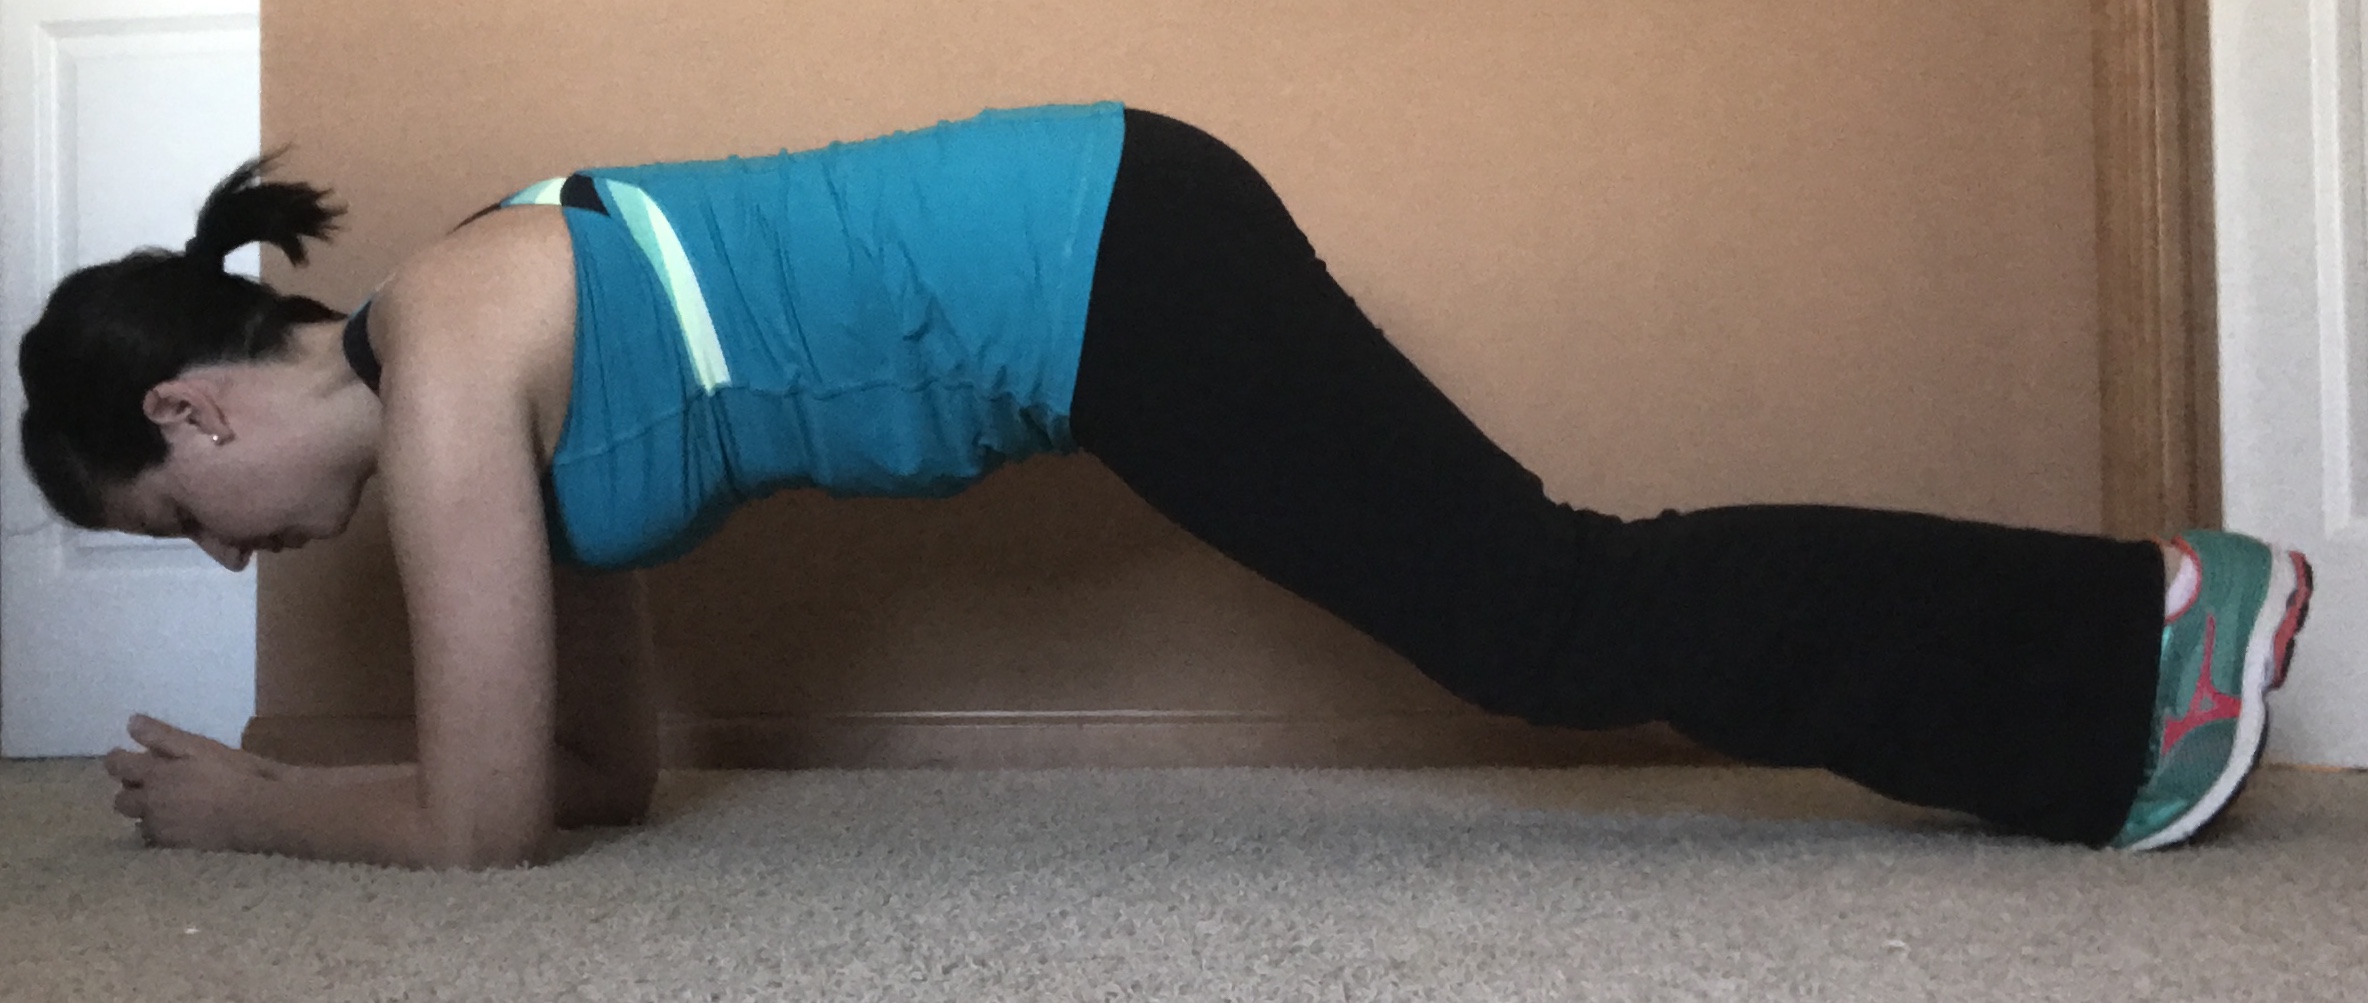
JESSICA’S SAFE, EFFECTIVE PLANK:
- Start on hands and knees. Bring elbows down to the floor. Place the elbows right under your shoulders. (We just saved your wrists.)
- Make sure your feet are together. Straighten your legs out behind you as you would for the other kind of plank, but then walk your feet in towards your elbows about 3-5 inches. Your hips will lift when you do this. (We just made it impossible for you to engage your low back muscles. Your abs are engaged 100%, even when they get fatigued.)
- If you have no knee injuries, bend your knees a little bit. If that hurts your knees in any way, keep them straight. This helps shift more of your body weight to your midsection, keeping it out of your legs and ultimately, creating more load for the abdominals.
- Make sure the shoulders are still stacked over the elbows. (Now you have a solid base of support.)
If your trainer doesn’t know this about planks already, then please show them this article. Have them try it right there on the spot and see if their abs don’t start to feel it way faster than a traditional plank.
Good form. No back strain. Abs feeling it.
Be safe and smart out there, People! Happy Planking!


